
| Quick Summary: Plug in your Rockspace extender, connect to rockspace_EXT Wi-Fi, open re.rockspace.local in a browser, follow the wizard to select your main network, then relocate the extender halfway between your router and the weak spot. |
Your Rockspace Wi-Fi extender picks up your existing router signal and rebroadcasts it into areas your router can’t reach. This guide walks you through setup, relocation, and the optional WPS shortcut.
Need login help for a full router? See our guides on Wavlink Router Login, Cudy Router Login, and ZTE Router Login.
What You Need Before You Start
Have these items ready and your setup will be done in under 10 minutes.
- Rockspace extender: plugged in near your router
- Your main Wi-Fi name (SSID): the network to extend
- Your main Wi-Fi password: needed during setup
- A phone or laptop: to run the setup wizard
- A web browser: Chrome, Firefox, Safari, or Edge
Step 1: Plug In and Connect to Your Extender
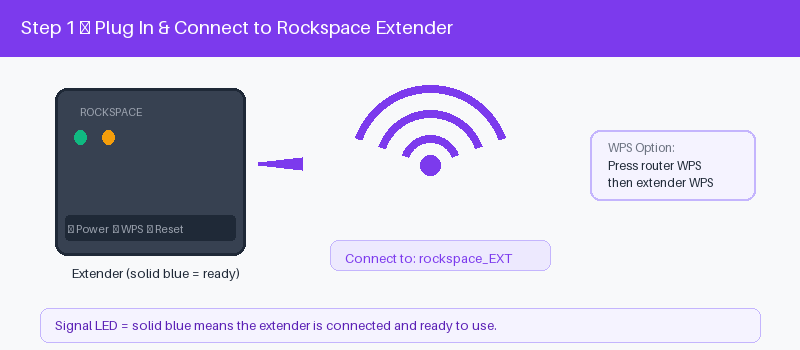
Plug the extender into a power outlet near your main router. Wait for the power LED to turn solid blue, this means the extender is on and ready. Then connect your phone or laptop to the extender’s default Wi-Fi.
The default Wi-Fi name is rockspace_EXT for the 2.4 GHz band or rockspace_5G_EXT for the 5 GHz band. No password is needed at this stage.
| Tip: Start the setup with the extender close to your router. You will move it to the ideal location after setup is complete. |
Step 2: Open the Rockspace Setup Page
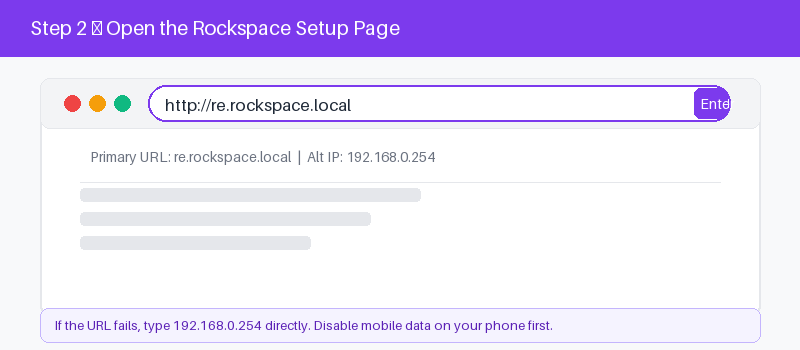
Open any web browser and type the setup address into the address bar at the top. Press Enter to load the Rockspace setup wizard.
http://re.rockspace.local
If that address does not load, your phone may still be using mobile data. Turn off mobile data and try again. If it still fails, use the IP address fallback instead.
Use this table to find the correct address for your Rockspace model.
| Address | Type | When to Use |
|---|---|---|
| re.rockspace.local | Hostname URL | Try this first on all models |
| 192.168.0.254 | IP address fallback | Use if URL doesn’t load |
| 192.168.0.1 | Router gateway (reference) | Your main router, not extender |
| Important: Type the address into the TOP address bar of your browser, not into Google or a search engine. They look similar but work differently. |
Step 3: Run the Setup Wizard
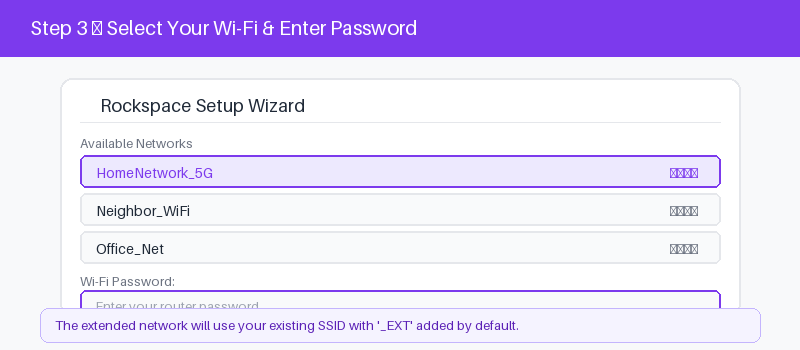
The setup wizard opens automatically. First, you will be asked to create an admin password for your extender, write this down. Then the extender scans for available Wi-Fi networks.
- Create a new admin password when prompted. Store it safely.
- Select your existing Wi-Fi network (SSID) from the list of detected networks.
- Enter the password for your main router into the password field.
- Click Extend or Next. The extender will connect and configure.
- By default, the extended network keeps your SSID and adds _EXT to the end.
Here is a reference table for all default Rockspace setup values:
| Setup Field | Default Value | Notes |
|---|---|---|
| Setup URL | re.rockspace.local | Primary, try this first |
| Alt IP Address | 192.168.0.254 | Use if URL fails to load |
| Default Wi-Fi (2.4G) | rockspace_EXT | Pre-configured factory name |
| Default Wi-Fi (5G) | rockspace_5G_EXT | Pre-configured factory name |
| Admin Password | Set on first login | You create this during setup |
| WPS Timeout | 2 minutes | Press extender WPS within 2 min |
| You can rename the extended network to match your main Wi-Fi exactly. This lets devices roam between router and extender without switching networks manually. |
Step 4: Relocate Your Extender for Maximum Coverage
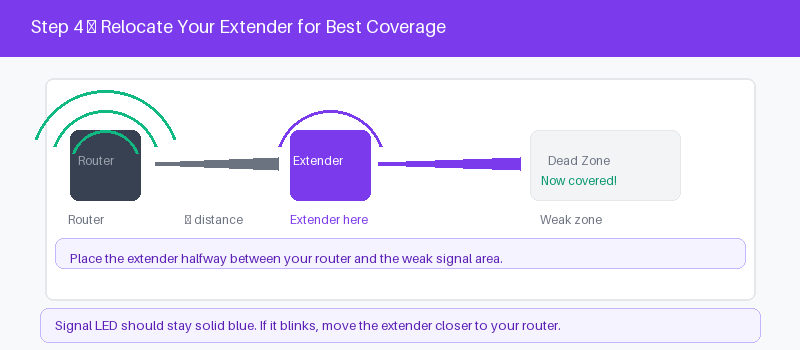
Once setup is complete, the extender’s job changes. Unplug it and move it to the ideal spot, halfway between your main router and the area with weak Wi-Fi signal.
- Unplug the extender from its current outlet.
- Move it halfway between your router and the weak signal area.
- Plug it back in and wait 60 seconds for it to reconnect.
- Check the Signal LED: solid blue means a good connection.
| If the Signal LED blinks or turns amber, the extender is too far from your router. Move it one room closer and check again. |
WPS Quick Setup: Faster Alternative Method
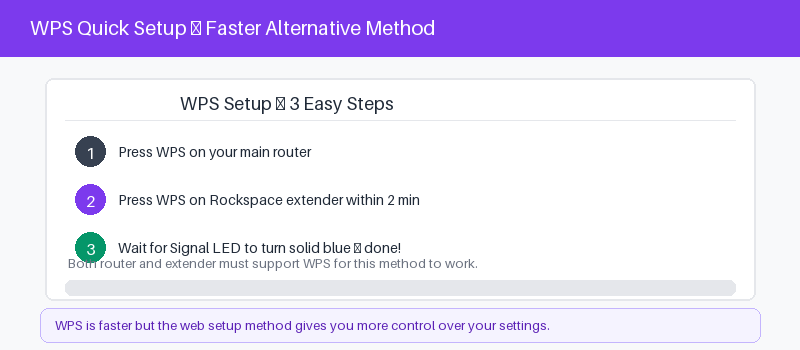
If both your router and your Rockspace extender have a WPS button, you can skip the web browser setup entirely. WPS takes about 2 minutes and requires no passwords.
- Press the WPS button on your main router and release it.
- Within 2 minutes, press the WPS button on the Rockspace extender.
- Wait for the Signal LED to turn solid blue. Setup is complete.
| WPS is the fastest method but gives you less control. The web setup wizard (Steps 2, 3) lets you choose a custom network name and password. |
Troubleshooting: Common Problems and Fixes
Setup Page Will Not Load
Make sure your device is connected to the rockspace_EXT network and not your home Wi-Fi or mobile data. Turn off mobile data completely. Type the address into the top address bar of your browser, not into Google.
Extender Will Not Connect to My Router
Double-check that you entered your main router’s Wi-Fi password correctly, it is case-sensitive. Move the extender closer to the router and try again. You can also visit Rockspace’s official support page for model-specific help.
Signal LED Is Not Solid Blue After Relocation
The extender is too far from your router. Move it one room closer. The extender must stay within range of your main router to work properly, halfway is a guide, not a rule.
Frequently Asked Questions
What is the default setup address for a Rockspace extender?
Type http://re.rockspace.local into your browser’s address bar. If that fails, use http://192.168.0.254 as the fallback. Both open the same Rockspace setup wizard.
Does the Rockspace extender need its own Wi-Fi password?
No. By default it uses the same password as your main router. You can change the extended network name and password during setup if you prefer to keep them separate.
Can I manage the Rockspace extender from my phone?
Yes. Connect your phone to the rockspace_EXT Wi-Fi and open a mobile browser. Type in the setup address and the wizard works the same way as on a laptop.
How do I reset my Rockspace extender to factory defaults?
Press and hold the Reset button on the extender for about 10 seconds. All custom settings are cleared. You will need to run through the setup wizard again from Step 1.
What is the difference between 2.4 GHz and 5 GHz on the Rockspace extender?
The 2.4 GHz band has a longer range but slower speeds. The 5 GHz band is faster but covers a shorter distance. Most extenders broadcast both simultaneously.
Related Wi-Fi Guides
Need help with a router or another extender brand? These guides walk you through the same process.
- Wavlink Router Login, Step-by-Step Guide
- Cudy Router Login & Admin Panel Guide
- ZTE Router Login, Default Credentials
- Netgear Wi-Fi Extender Setup Guide
- How to Secure Your Home Wi-Fi, CISA
Final Thoughts
Setting up your Rockspace extender takes less than 10 minutes once you know the right steps. Bookmark this page so you have it handy if you ever need to reset and reconfigure.
For more help, visit Rockspace’s official support page or check your extender’s quick-start card.
| Found this guide helpful? Share it with someone who needs better Wi-Fi coverage at home. |